For the postcard holder DIY you need:
- Air-drying clay
- Cookie cutters
- Clay roller
- Modelling tool
- Acrylic paints
- Paint brush
- Water
- a placeholder for the postcard (e.g. a ruler)

The materials for the postcard holder DIY
And this is how it works:
To avoid your table getting dirty, prepare your work surface first by covering it with newspaper, a mat or something similar. Fill a glass or cup with some tap water and have it ready - you may need the water for the finishing touches when shaping. Now break off some clay and form a ball with your hands. Use the clay roller to roll the clay flat like dough. It should be at least 1cm thick. Now choose a cookie cutter and cut out the clay like a biscuit. You can put the leftovers back with the rest of the clay and use them again later.


Roll out some clay, cut out a shape and smooth it out with your fingers
Press the clay out of the cookie cutter and smooth the sides and corners with your fingertips. If that doesn't work, dip your fingers in a little water and try again. It's important that the bottom, where the postcard holder will stand, is particularly smooth. Test its stability again and again.
When you are happy with the shape, use a suitable modelling tool to cut a cut into the top of the mould. This is where the postcard should end up. Feel free to use a postcard to check whether the cut is deep enough. When drying the clay, we recommend that you put a ruler or other substitute in the slot so that your postcard is not damaged. Now it's time to wait until the clay is dry - how long this takes is stated on the packaging of your clay (usually 24 hours). Of course, you can prepare many more clay holders in the meantime and then let them dry together!

The final touches and then it’s time to let it dry!
As soon as all your postcard holders are dry, you can start painting! Tip: If your figures aren't quite stable, sand the bottom smooth with some sandpaper. Grab some acrylic paints and brushes and paint your figures as you like. Make sure that no paint runs into the slot, otherwise the card may no longer fit. Depending on the opacity of your paints, your piece may need a second coat of paint. But always let the first coat of paint dry before you continue. For smaller details like faces, we recommend working with a felt-tip pen.

Next step: paint!
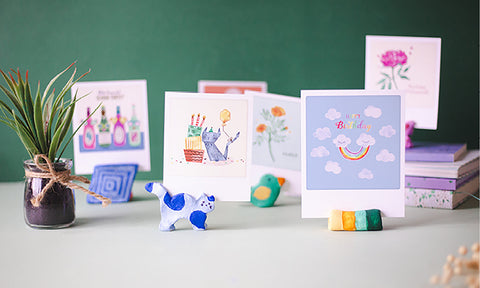
If you are happy with the result, you just need to be patient until everything has dried. Finally, all you have to do is place the postcards and your very own postcard holder is ready! Decorate your desk or a shelf or give your next postcard as a gift together with a beautiful postcard holder!


And the postcard holders are ready!
Feel free to share your postcard holders with us on Instagram and tag us with @pickmotion or #pickmotiondiy. We look forward to seeing all your beautiful creations!


